


This tutorial of "Easy Electronics NodeMCU Based 4-Channel Relay Board" is an introduction with Blynk 2.0
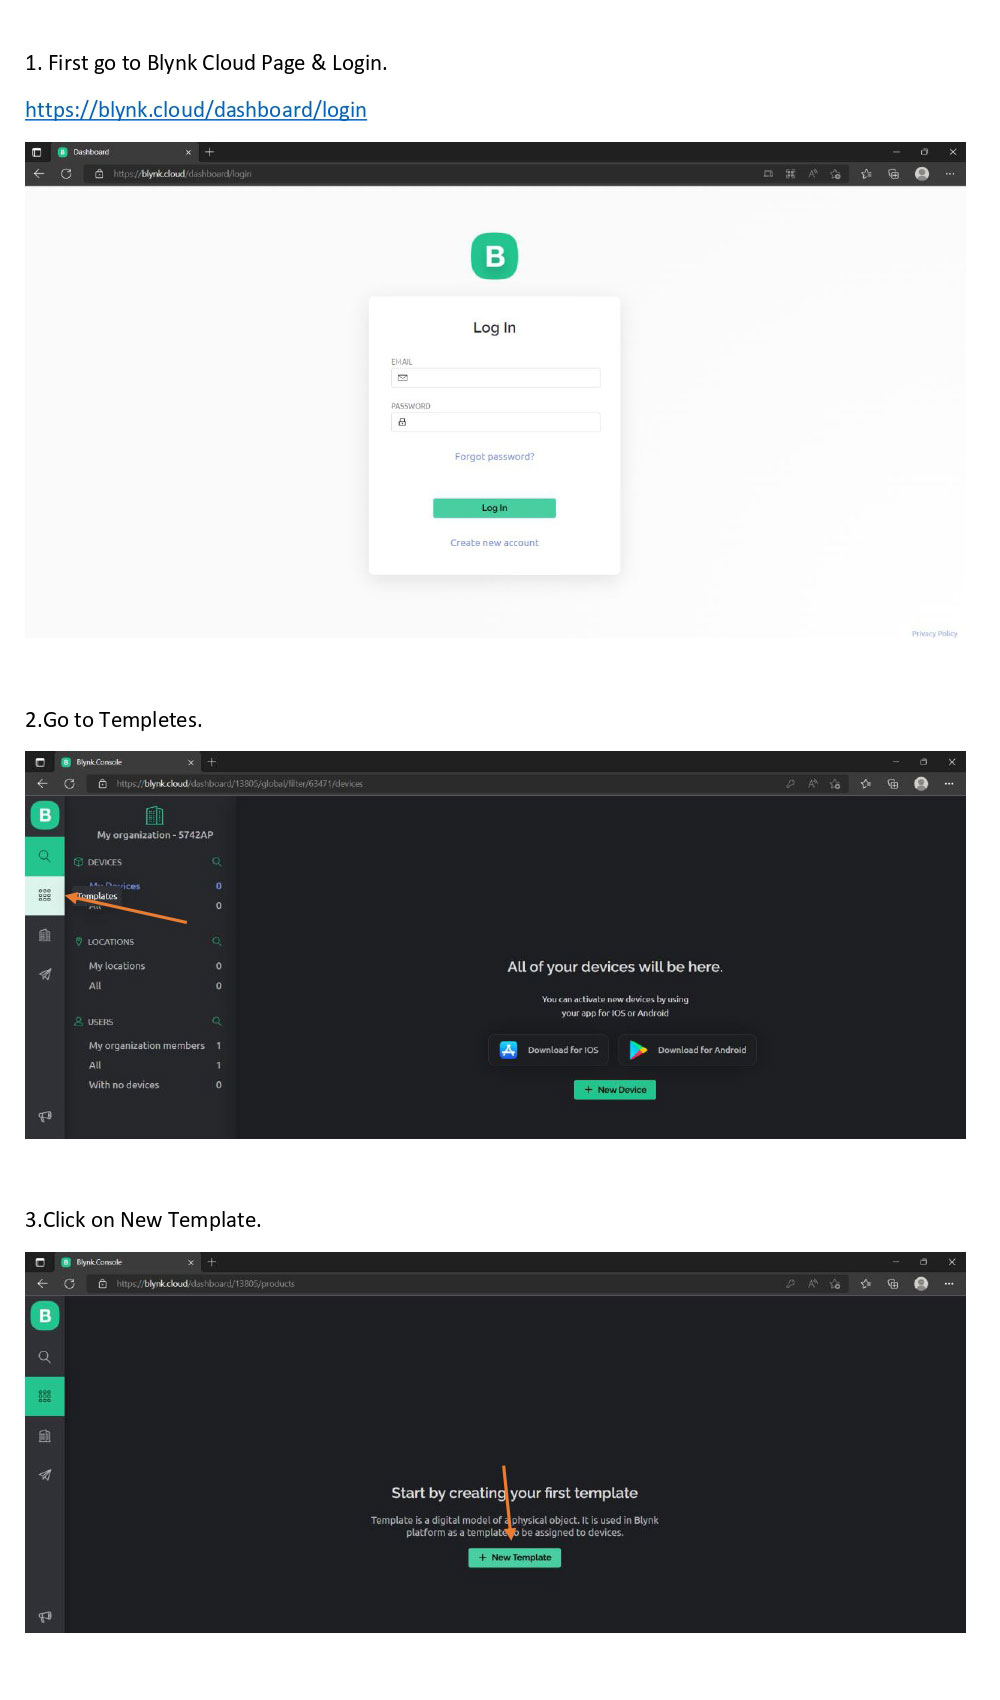
Blynk Cloud Page & Login URL
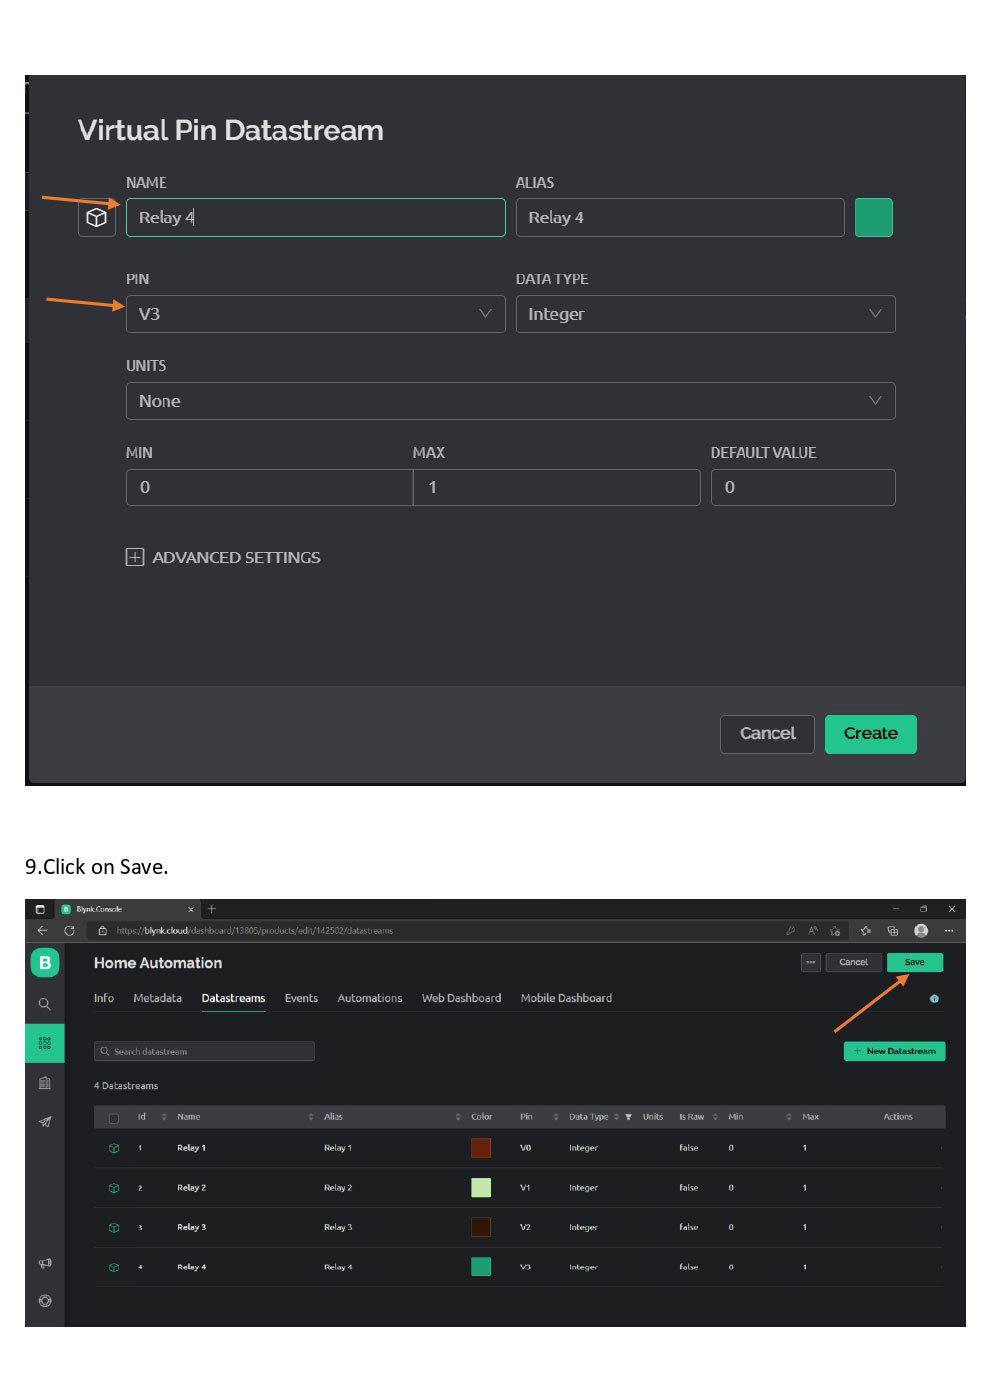
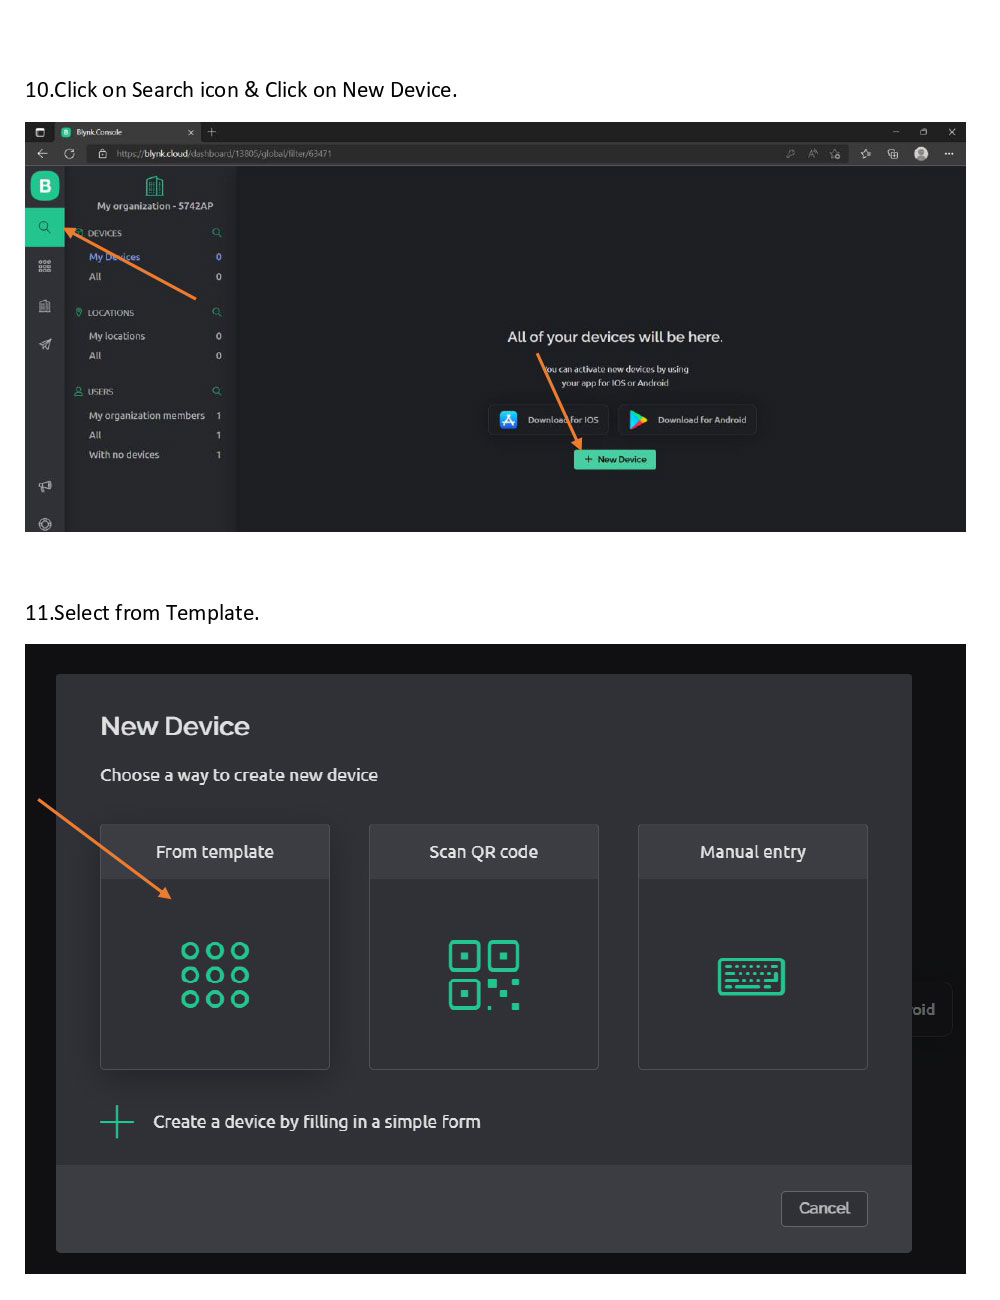
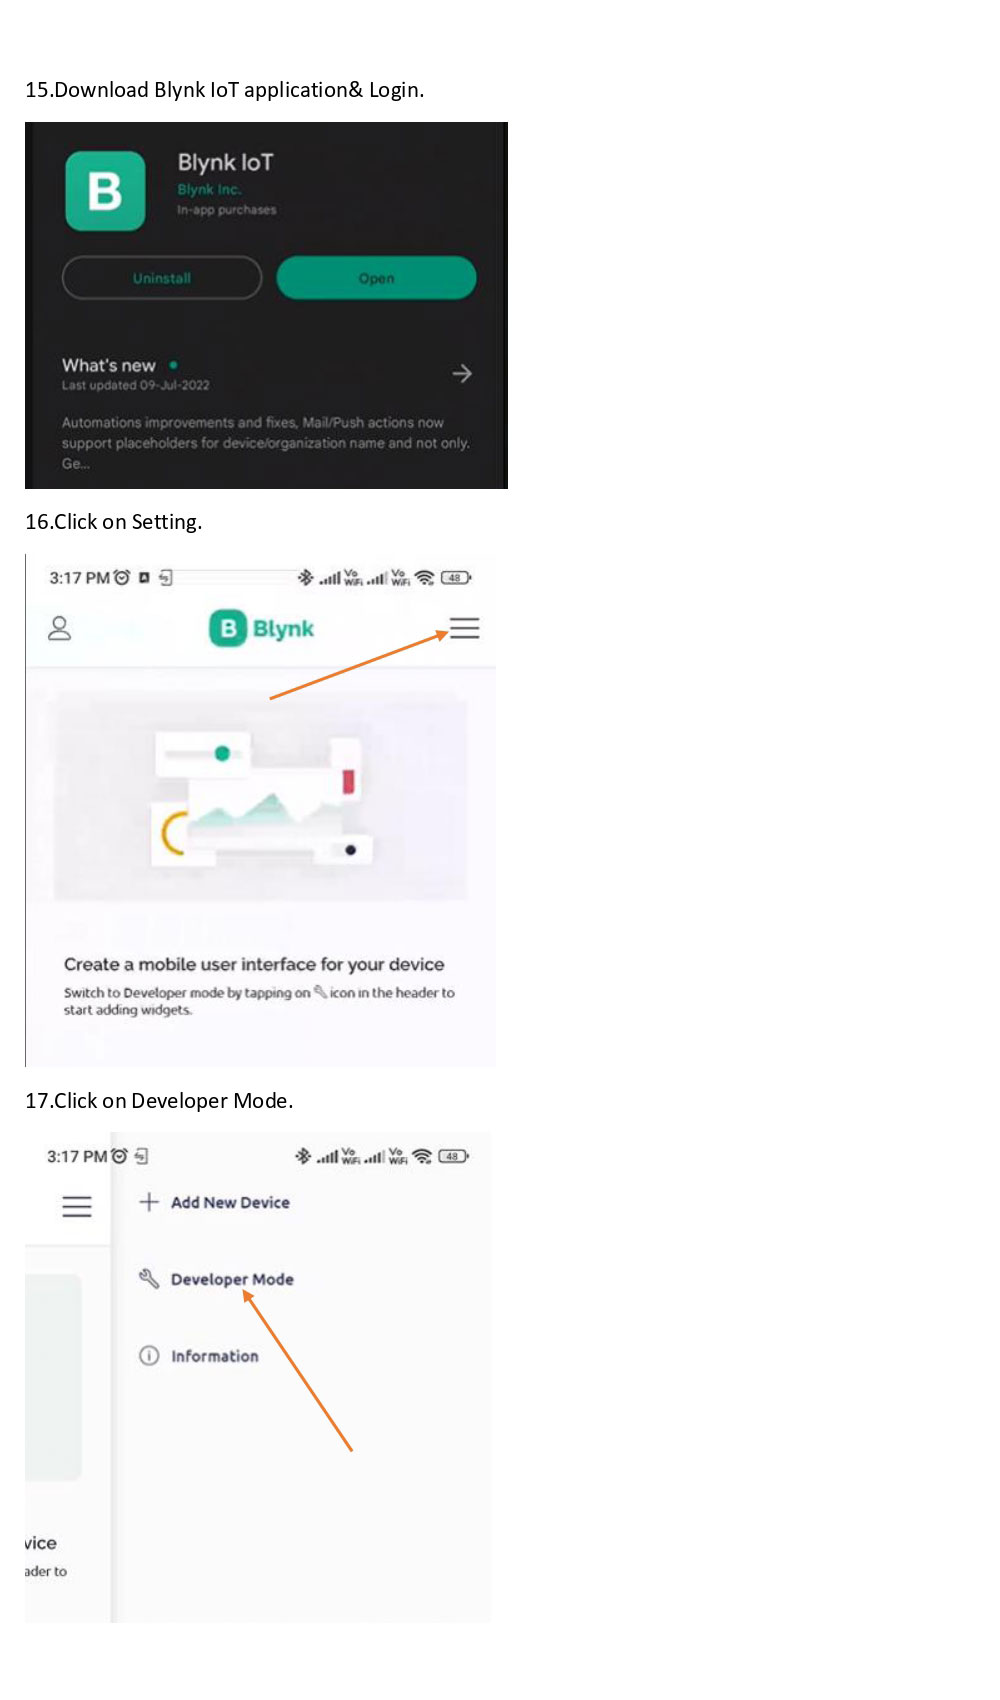
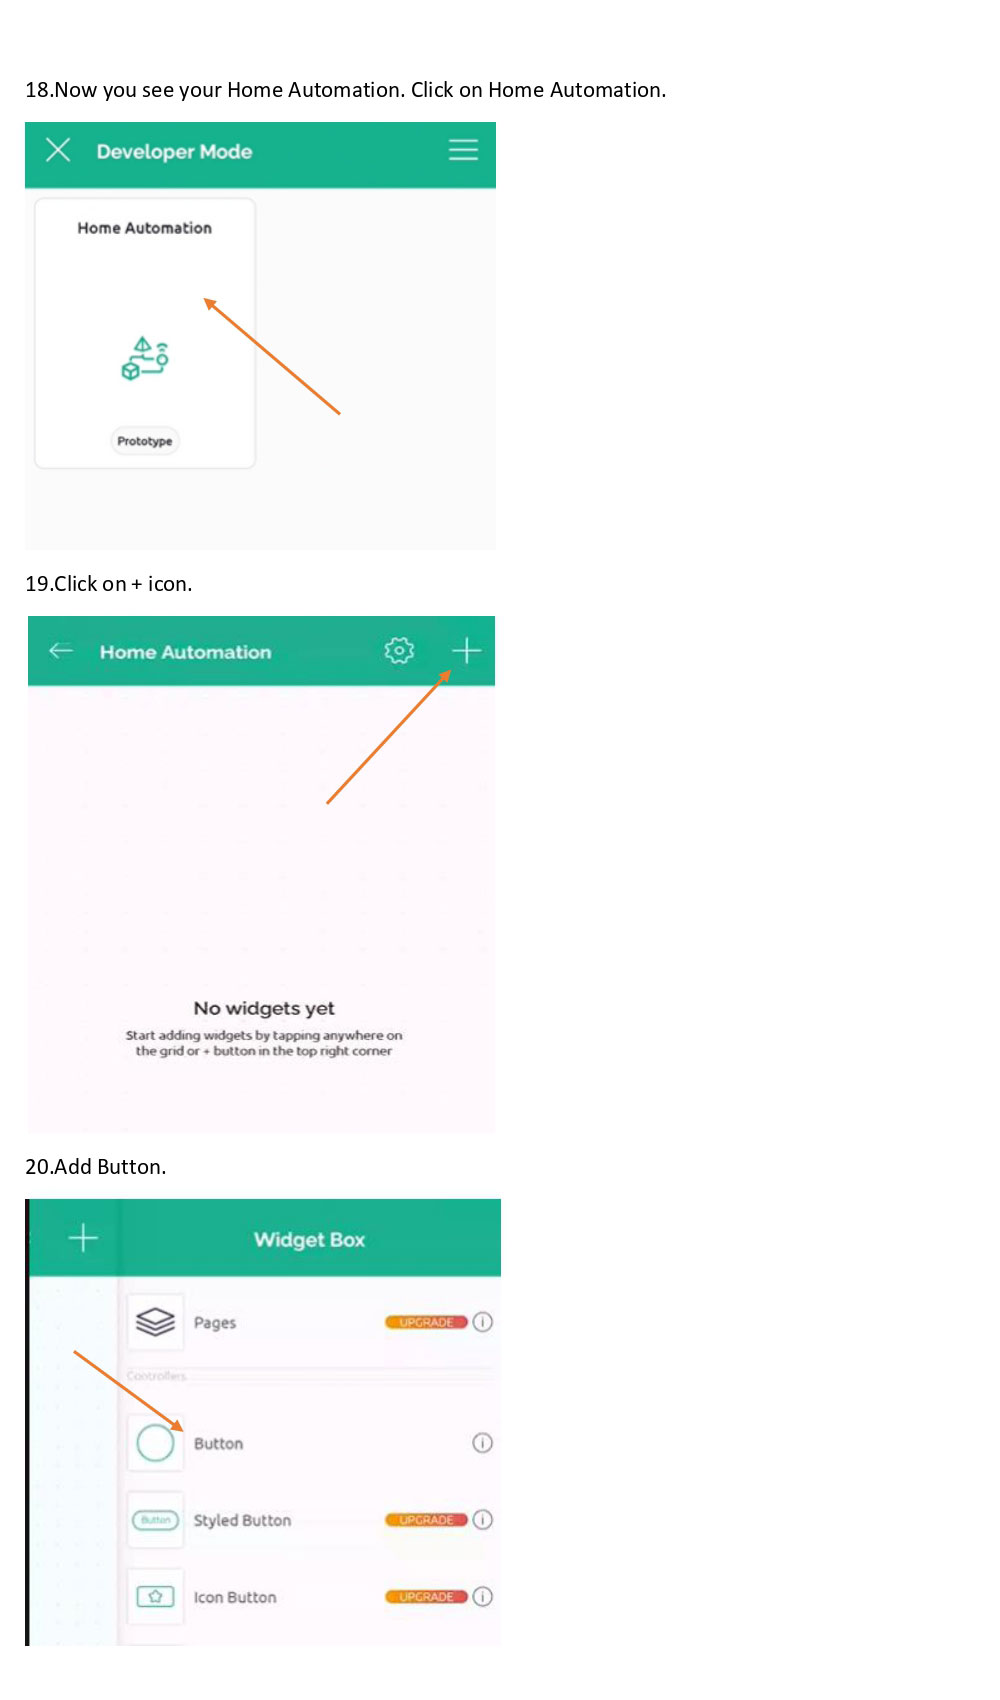
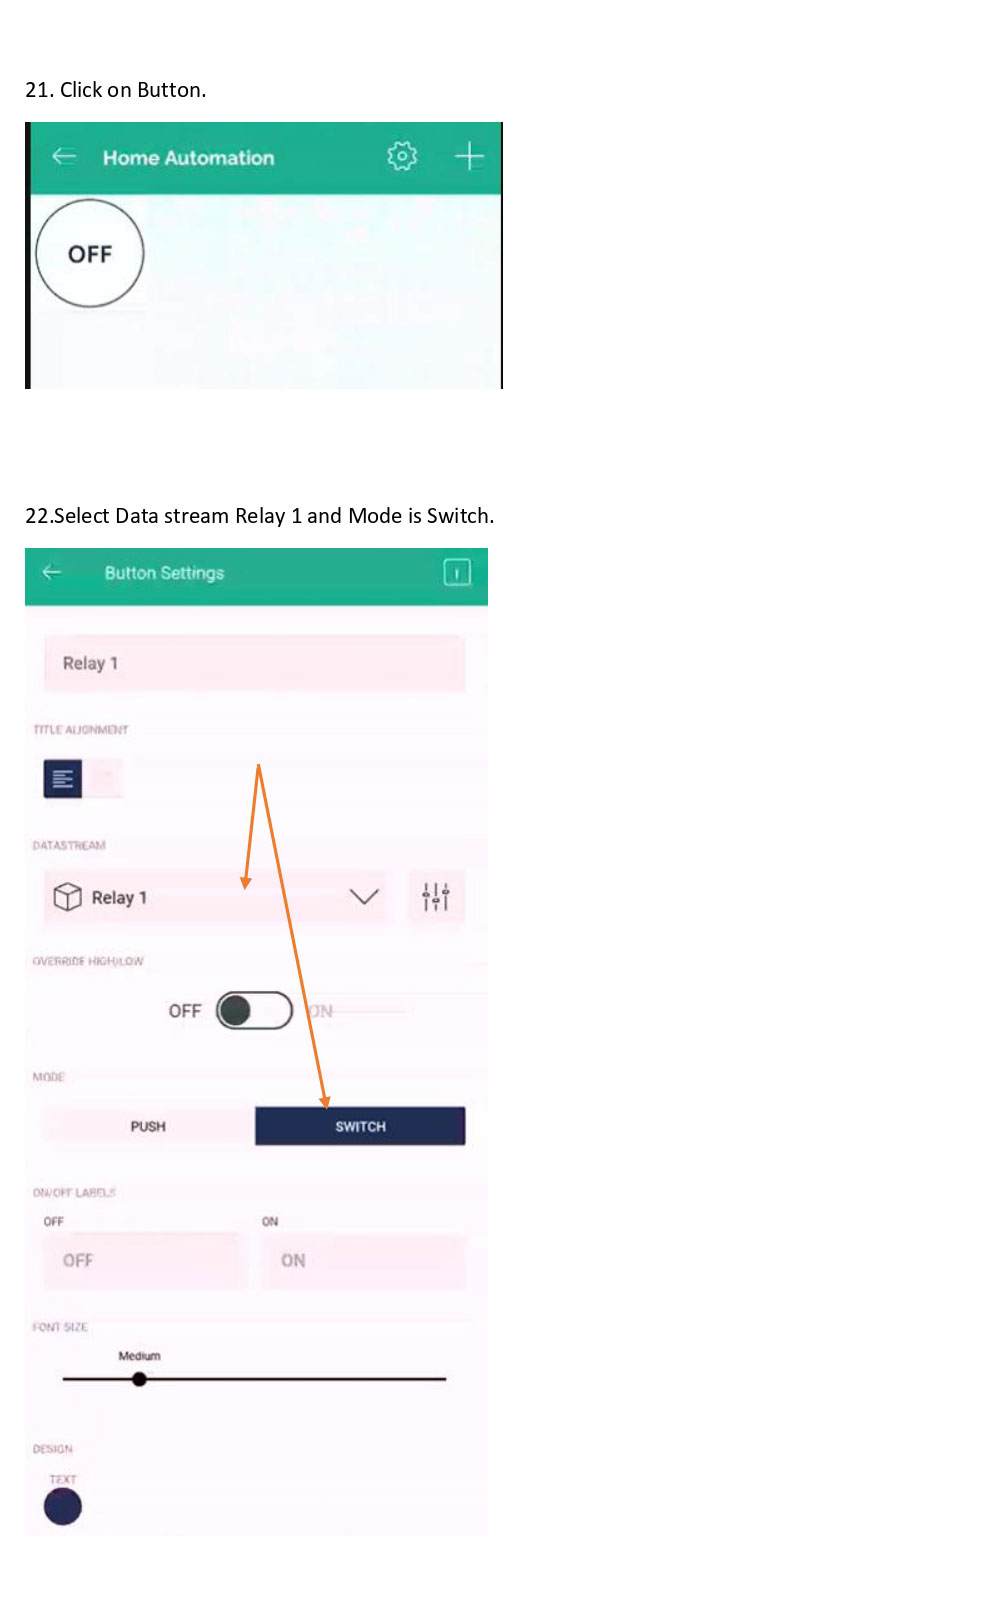
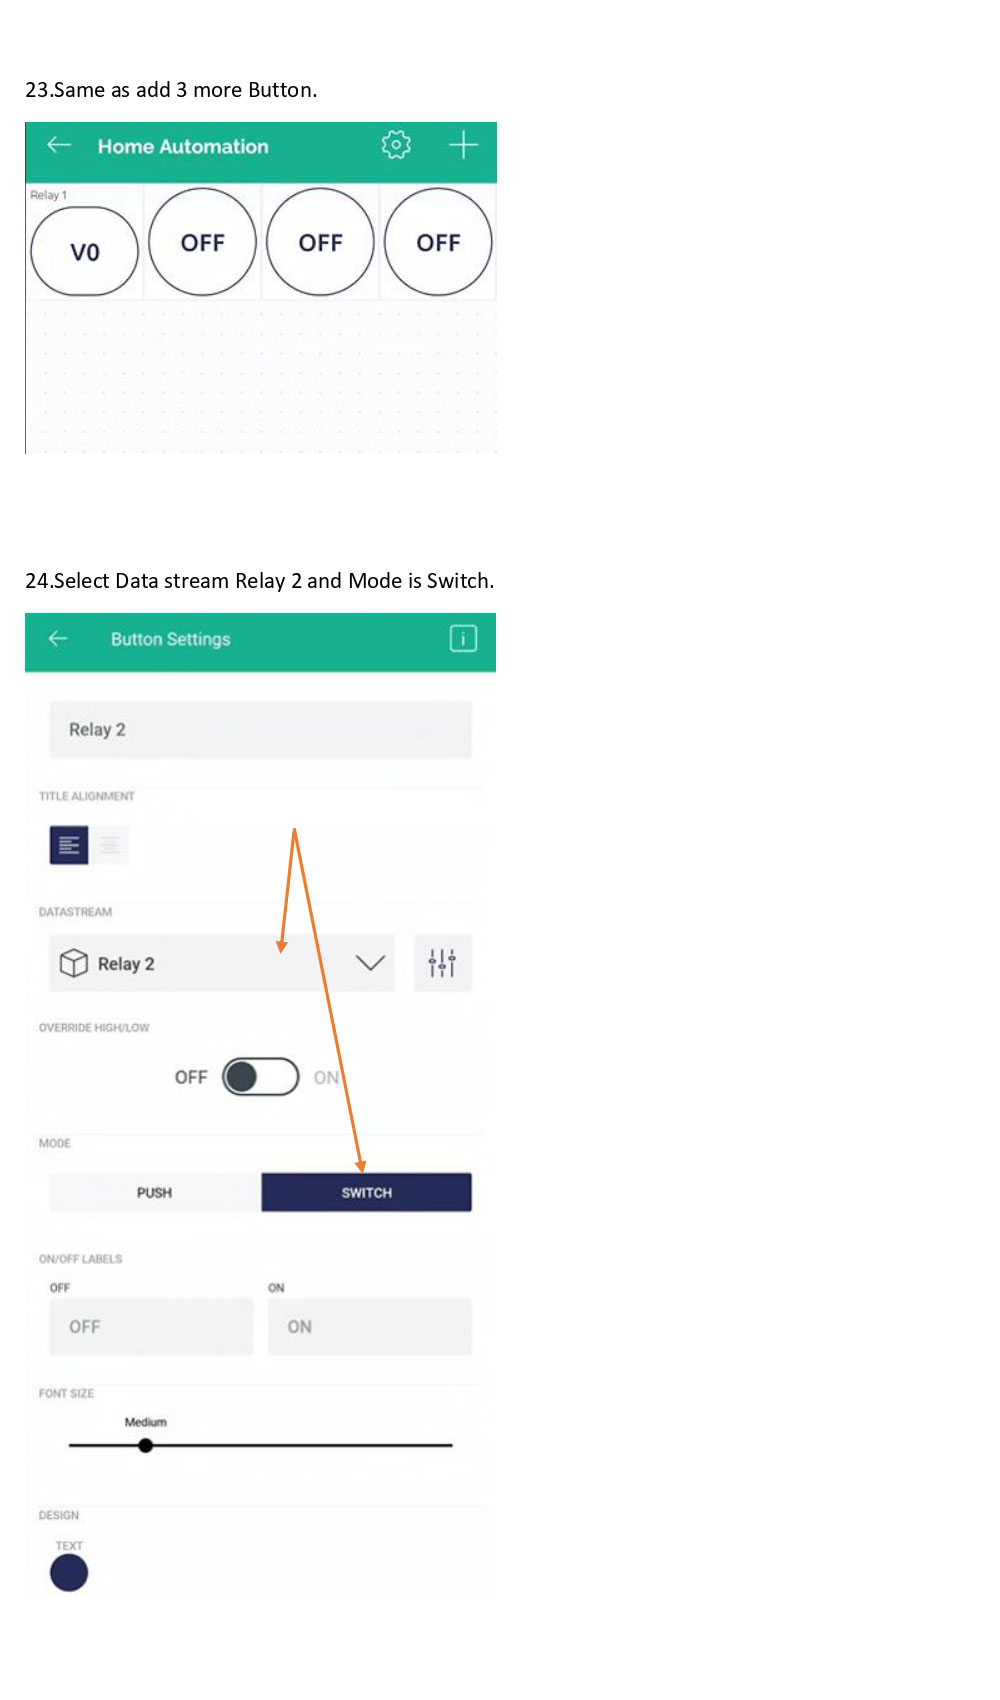
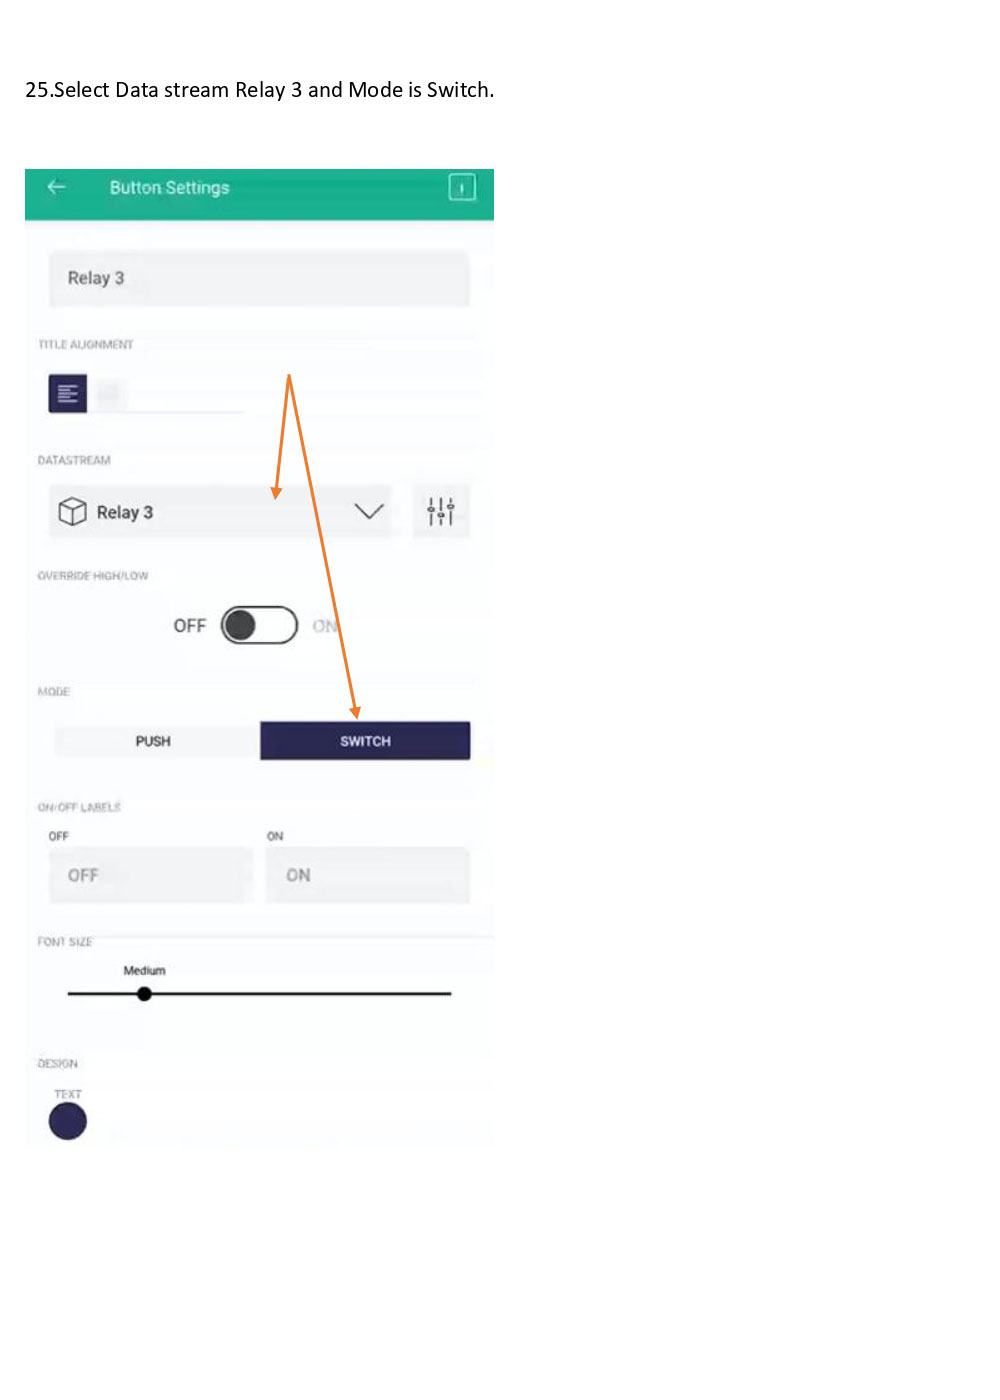
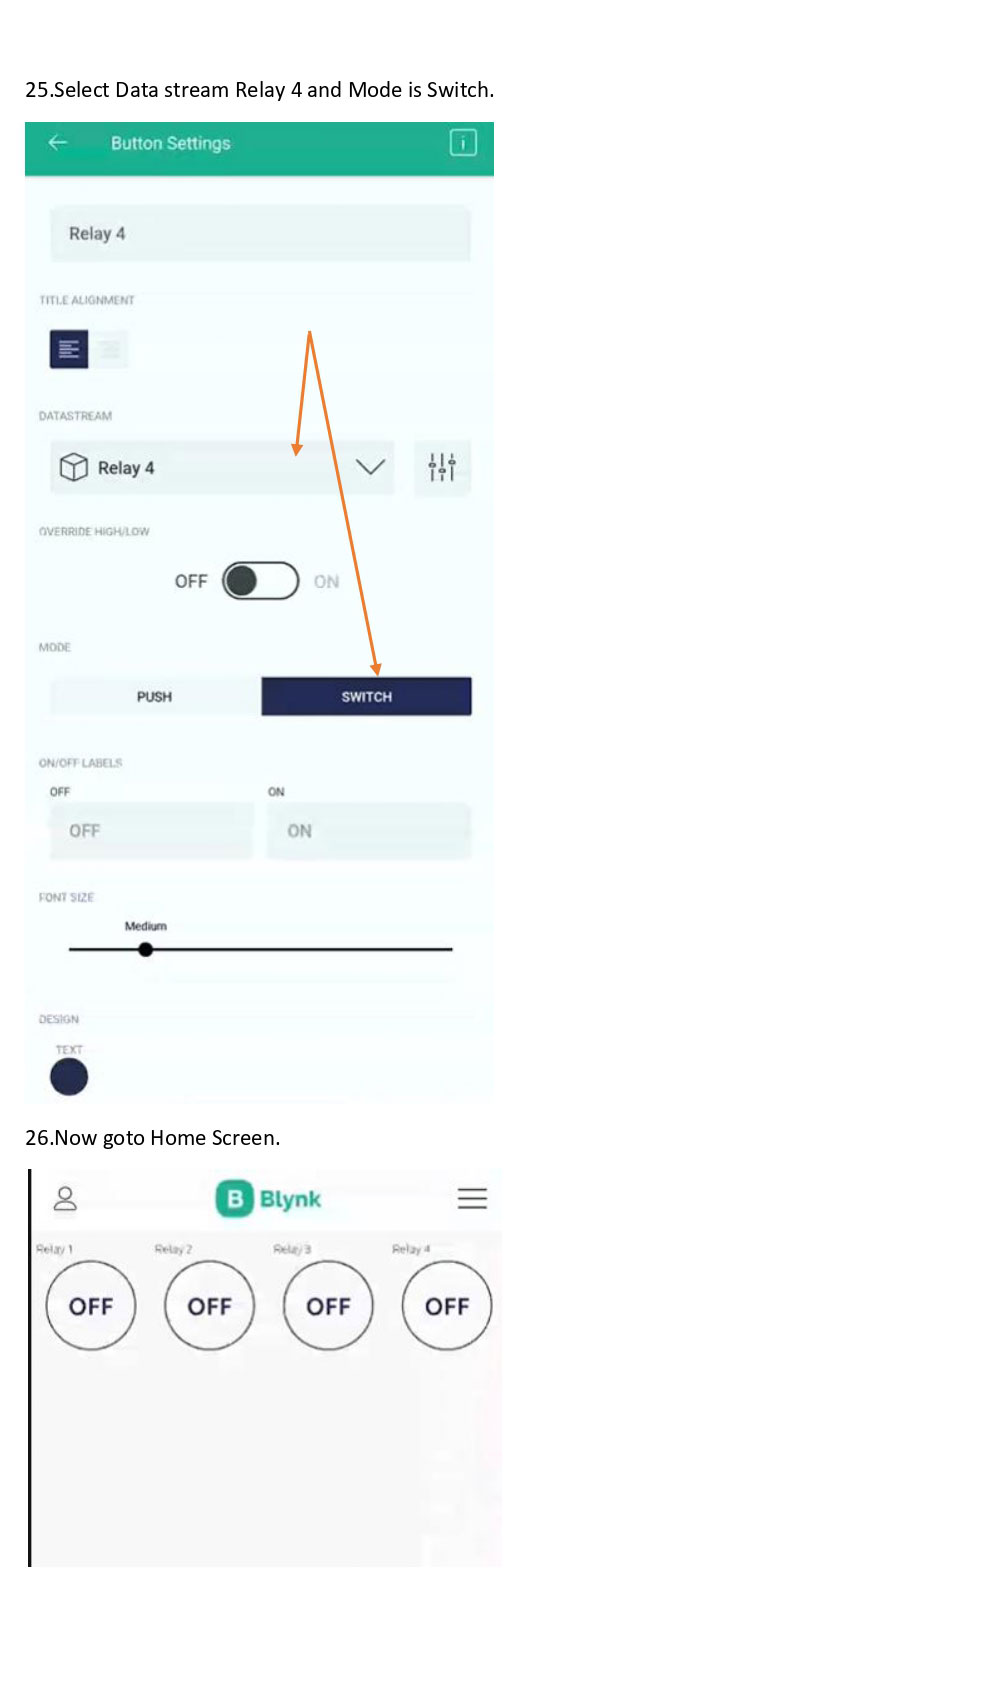
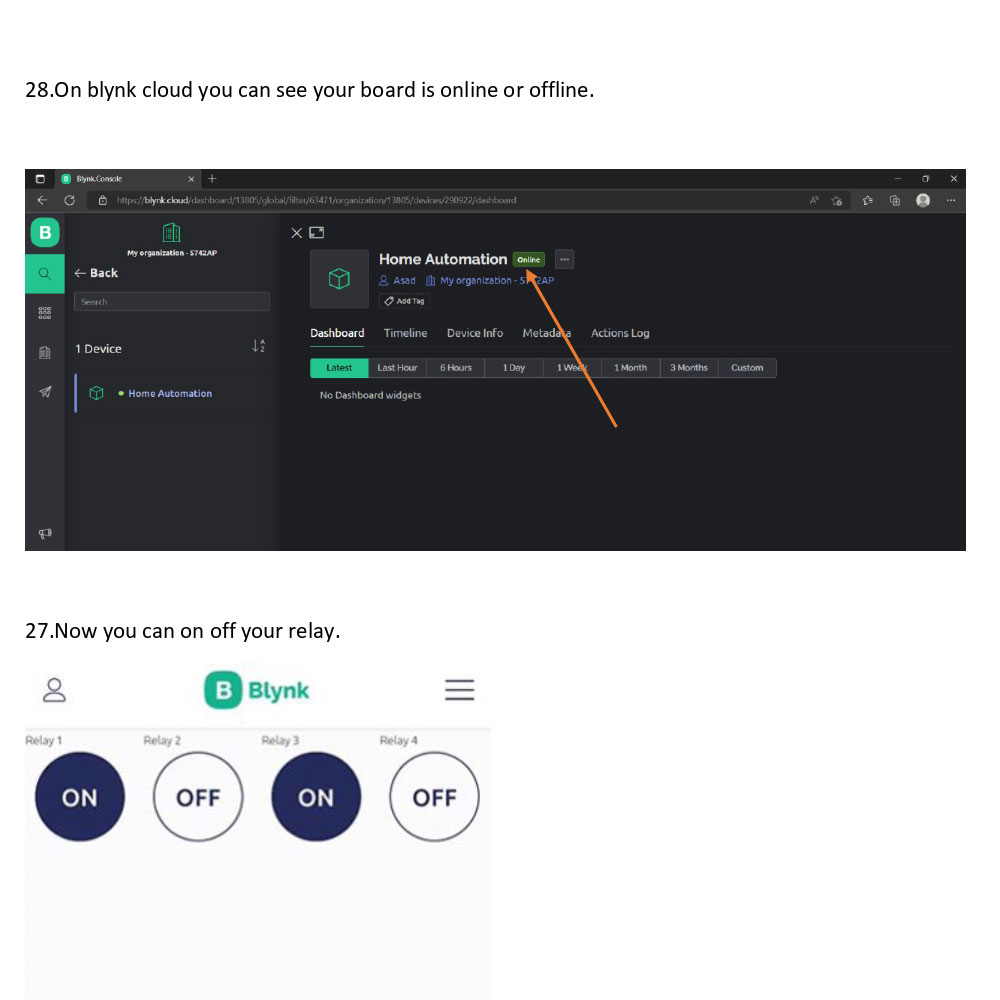
Detailed Tutorial:
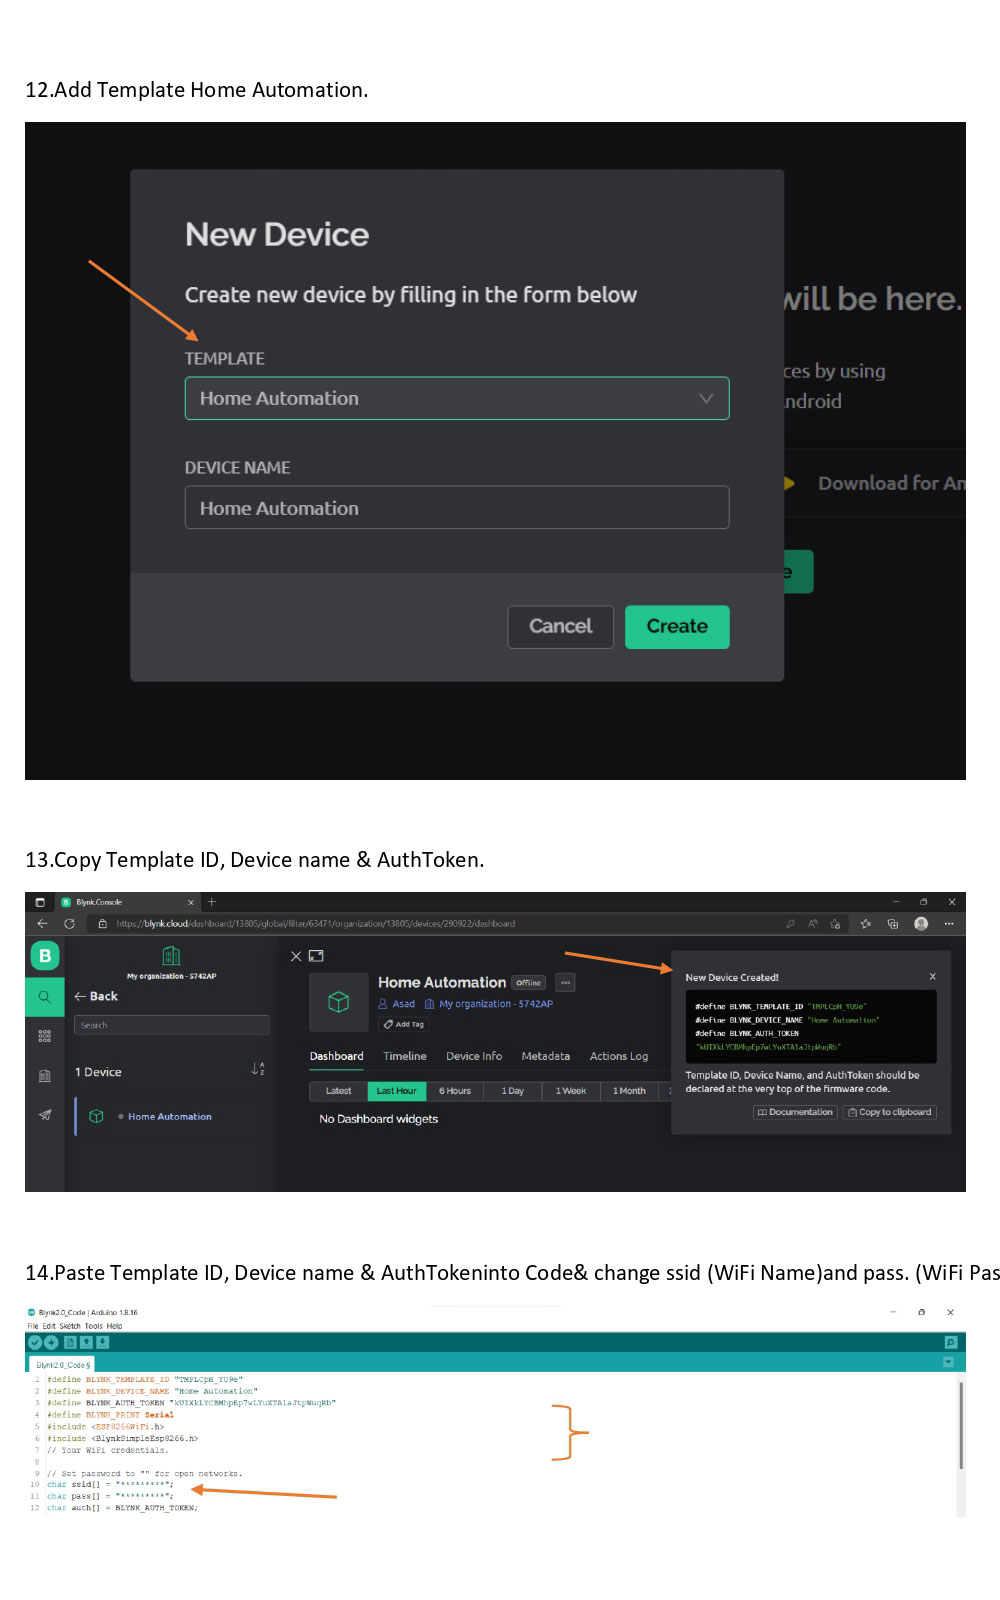
#define BLYNK_TEMPLATE_ID "TMPLCpH_YU9e"
#define BLYNK_DEVICE_NAME "Home Automation"
#define BLYNK_AUTH_TOKEN "kUIXkLYCBMhpEp7wLYuXTA1aJtpWuqRb"
#define BLYNK_PRINT Serial
#include <ESP8266WiFi.h>
#include <BlynkSimpleEsp8266.h>
// Your WiFi credentials.
// Set password to "" for open networks.
char ssid[] = "GNXS-297888";
char pass[] = "1234567890";
char auth[] = BLYNK_AUTH_TOKEN;
BLYNK_WRITE(V0) {
int value = param.asInt();
Serial.println(value);
if (value == 1)
{
digitalWrite(D2, LOW);
Serial.println("LED ON");
}
if (value == 0)
{
digitalWrite(D2, HIGH);
Serial.println("LED OFF");
}
}
BLYNK_WRITE(V1) {
int value = param.asInt();
Serial.println(value);
if (value == 1)
{
digitalWrite(D3, LOW);
Serial.println("LED ON");
}
if (value == 0)
{
digitalWrite(D3, HIGH);
Serial.println("LED OFF");
}
}
BLYNK_WRITE(V2) {
int value = param.asInt();
Serial.println(value);
if (value == 1)
{
digitalWrite(D4, LOW);
Serial.println("LED ON");
}
if (value == 0)
{
digitalWrite(D4, HIGH);
Serial.println("LED OFF");
}
}
BLYNK_WRITE(V3) {
int value = param.asInt();
Serial.println(value);
if (value == 1)
{
digitalWrite(D5, LOW);
Serial.println("LED ON");
}
if (value == 0)
{
digitalWrite(D5, HIGH);
Serial.println("LED OFF");
}
}
BLYNK_CONNECTED()
{
Blynk.syncVirtual(V0); // will cause BLYNK_WRITE(V0) to be executed
Blynk.syncVirtual(V1);
Blynk.syncVirtual(V2);
Blynk.syncVirtual(V3);
}
void setup()
{
digitalWrite(D2, HIGH);
digitalWrite(D3, HIGH);
digitalWrite(D4, HIGH);
digitalWrite(D5, HIGH);
Serial.begin(9600);
Blynk.begin(auth, ssid, pass);
pinMode(D2, OUTPUT);
pinMode(D3, OUTPUT);
pinMode(D4, OUTPUT);
pinMode(D5, OUTPUT);
}
void loop()
{
Blynk.run();
}